What Is a Wagon Wheel Flower Garden?
A wagon wheel flower garden is a vertical garden display built around an old wooden or metal farm wheel.
The wheel acts as both the structure and the decorative centerpiece. Small planters, cans, buckets, or pots can be attached to the spokes, while larger flowers can be planted in a box or container positioned near the center.
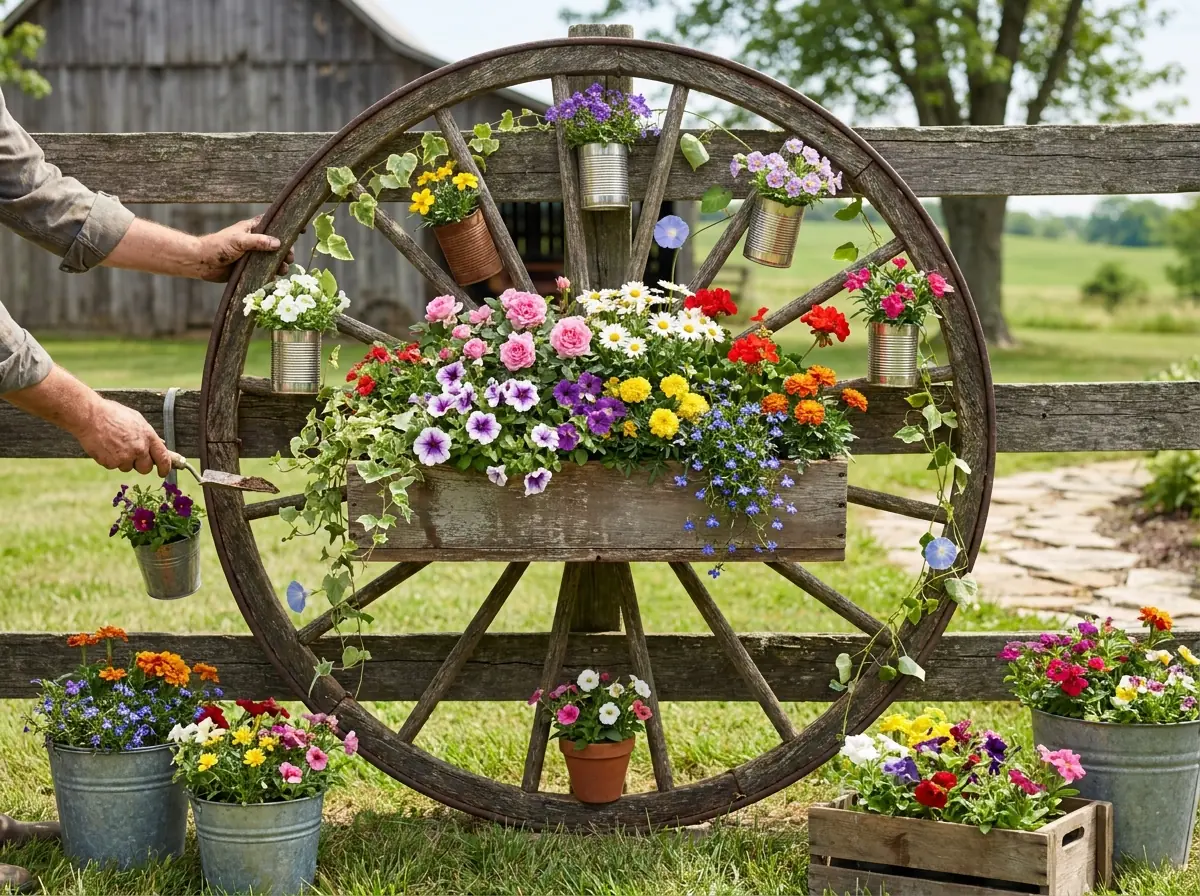
The example shown uses a large rusted wagon wheel standing upright against a wooden fence. Small metal containers are attached around the spokes at different heights, each holding colorful flowers or trailing vines.
A weathered rectangular wooden planter is mounted across the middle of the wheel and filled with a dense mix of flowers.
Additional buckets and pots around the base make the arrangement feel even fuller.
The result is part vertical garden, part recycled farm décor, and part floral centerpiece.
Materials Needed
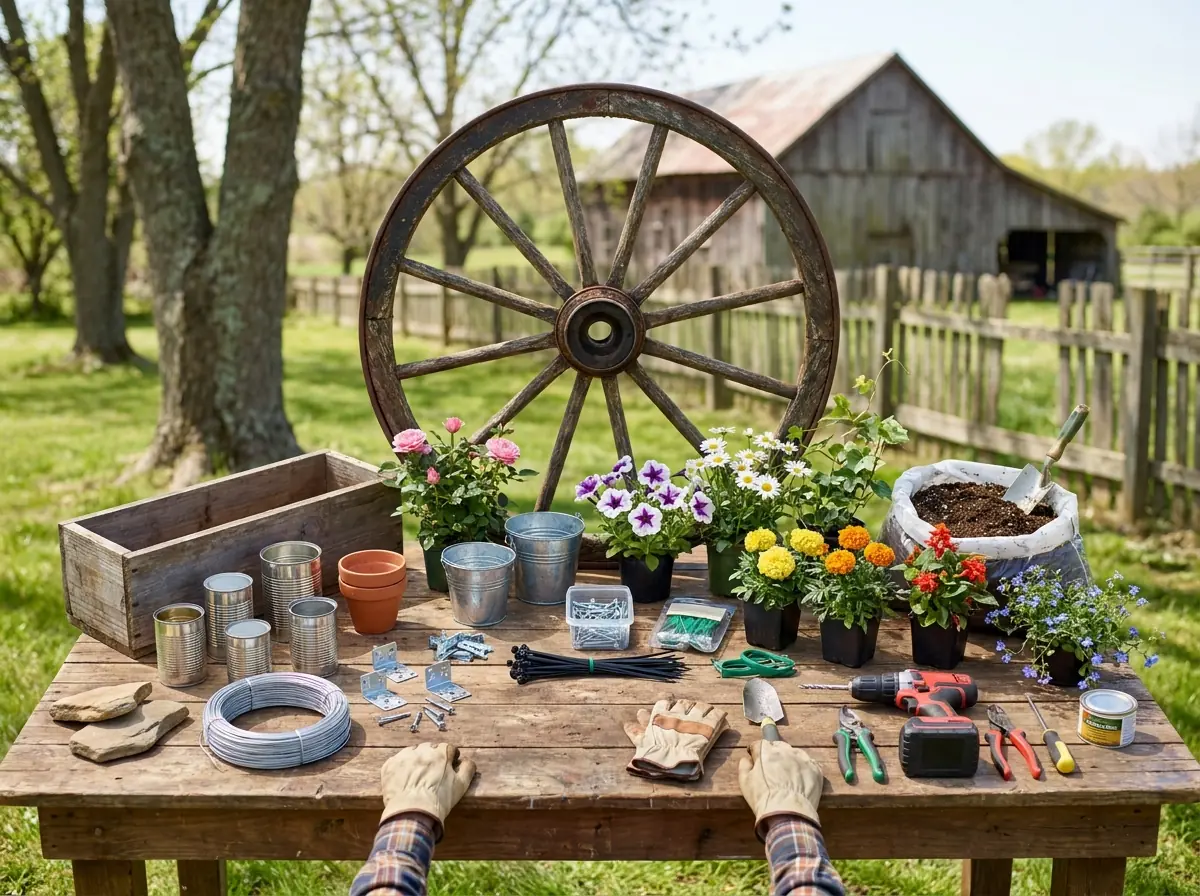
To create a wagon wheel flower garden similar to this one, you will need:
- One large old wagon wheel or decorative farm wheel
- Weathered wooden planter box
- Small metal cans or tin containers
- Small terracotta pots
- Galvanized buckets, optional
- Potting soil
- Compost or slow-release fertilizer
- Colorful flowering plants
- Trailing or climbing plants
- Strong metal wire
- Heavy-duty zip ties, optional
- Small metal brackets
- Screws
- Drill
- Screwdriver
- Pliers
- Gardening gloves
- Hand trowel
- Pruning shears
- Rust-resistant outdoor hardware
- Clear outdoor sealer, optional
- Landscape stones or gravel, optional
For a colorful cottage-garden effect, consider using flowers such as:
- Petunias
- Pansies
- Violas
- Daisies
- Marigolds
- Geraniums
- Lobelia
- Alyssum
- Miniature roses
- Verbena
Climbing morning glory or other lightweight vines can also be used along the spokes.
Step 1: Choose the Right Wagon Wheel
Start with a wheel that is structurally sound.
It can look rusty, weathered, and old, but the rim and spokes should still be strong enough to support several planters.
If you are using an authentic antique wheel, inspect it carefully for loose spokes, cracked wood, or heavily corroded metal.
A reproduction decorative wagon wheel can also work.
The ideal wheel is large enough to create visual impact but still manageable to move and secure.
A diameter of approximately 4 to 6 feet works well for a substantial backyard display.
Step 2: Clean the Wheel
Remove loose dirt, flakes of rust, cobwebs, and debris.
Use a stiff brush to clean the metal and wood.
Do not remove every sign of age.
The rusty surface and worn finish are part of the rustic aesthetic.
If the metal is severely rusted, brush away unstable flakes and apply a clear exterior sealer.
For wooden sections, a weatherproof wood sealer can help slow deterioration.
Allow everything to dry completely before assembly.
Step 3: Position and Secure the Wheel
A large wagon wheel can become unstable when filled with wet soil and plants.
This makes proper support essential.
Place the wheel against a strong wooden fence, vertical post, or dedicated frame.
Secure it using heavy-duty metal brackets, bolts, or strong exterior wire.
If the wheel is freestanding, attach it to sturdy posts anchored into the ground.
Do not rely on the weight of the wheel alone.
Wind, rain, and uneven soil can cause a large vertical garden to tip over if it is not secured.
Step 4: Prepare the Small Hanging Containers
Old tin cans, metal cups, small flowerpots, and vintage containers work perfectly for the smaller flowers.
Before planting, drill several small drainage holes in the bottom of every container.
Good drainage is extremely important because small metal pots can fill with water quickly after rain.
If using recycled food cans, remove sharp edges carefully.
You can leave the containers rusty and aged or paint them in muted farmhouse colors.
For the most natural rustic appearance, use a mix of finishes rather than identical pots.
Step 5: Attach the Containers to the Wheel
Arrange the small planters around the wheel before permanently attaching them.
Place some near the top, others along the sides, and several near the lower spokes.
Avoid perfect symmetry.
A slightly irregular arrangement makes the display feel more like a natural country garden.
Secure each pot using strong galvanized wire, metal brackets, or heavy-duty outdoor zip ties.
Test every container before adding soil.
It should not swing excessively or slide down the spoke.
Step 6: Build or Add the Central Planter Box
The large wooden planter in the middle becomes the main floral focal point.
Use a rectangular wooden box deep enough to support healthy roots.
A box approximately 8 to 12 inches deep works well for many annual flowers.
Make sure the bottom includes drainage holes.
For extra durability, line the interior sides with landscape fabric while leaving the drainage openings exposed.
Secure the box firmly to the wheel support or the fence behind it.
Because wet soil is heavy, do not suspend a large planter using only thin wire.
Use structural brackets or screws rated for exterior use.
Step 7: Fill the Planters With Soil
Use a lightweight, high-quality container potting mix.
Avoid using dense garden soil by itself because it can become too heavy and compacted.
Mix in a small amount of compost or slow-release fertilizer if desired.
Fill each container to about an inch below the rim.
This leaves room for watering without soil spilling over the sides.
For the central box, fill the planter evenly and lightly firm the soil without compressing it too tightly.
Step 8: Plant the Central Flower Arrangement
The central planter should contain the fullest and most colorful collection of flowers.
Use the classic container-gardening approach:
Thriller + filler + spiller.
The thriller plants are the tallest flowers, such as small roses or upright geraniums.
Filler plants include petunias, marigolds, and daisies.
Spiller plants such as lobelia or alyssum can cascade slightly over the planter edge.
Arrange taller plants toward the back and center.
Place lower plants around the front and sides.
Mix colors while repeating a few shades throughout the planter to keep the design visually connected.
Step 9: Plant the Small Wheel Pots
Use compact flowers in the smaller containers.
Pansies, violas, lobelia, and small petunias are especially suitable.
Because these containers hold less soil, avoid plants with large root systems.
Use one strong flowering plant per small pot, or combine two tiny plants if space allows.
Some containers can hold trailing greenery instead of flowers.
This helps break up the color and prevents the wheel from looking overly crowded.
Step 10: Add Climbing Vines
The wagon wheel spokes naturally function like a trellis.
Plant lightweight climbing vines near the lower sections and gently guide them upward.
Morning glory, sweet pea, or another compact vine can work well depending on your climate.
Loosely tie young stems to the spokes using soft garden ties.
As the plants grow, they will begin weaving naturally through the wheel.
Avoid aggressive vines that may completely cover the wheel and hide its rustic structure.
Step 11: Add Ground-Level Planters
Place a few additional pots around the base.
Galvanized buckets, terracotta pots, and old metal containers work well.
These help visually connect the vertical wheel garden with the surrounding landscape.
Plant them with flowers that repeat the colors used higher on the wheel.
A bright green foliage plant can also provide contrast.
Keep the ground-level arrangement loose and natural rather than perfectly aligned.
Step 12: Finish the Base
Place flat stones or gravel around the bottom of the wheel.
This provides a cleaner transition between the garden feature and the surrounding soil.
It can also help prevent mud from splashing onto the lower flowers after heavy rain.
For a true farmhouse look, irregular natural stones work particularly well.
Best Flowers for a Wagon Wheel Garden
Choose plants according to how much sunlight the wheel receives.
For sunny areas, good options include:
- Petunias
- Marigolds
- Geraniums
- Verbena
- Zinnias
- Sweet alyssum
For partial shade:
- Pansies
- Violas
- Lobelia
- Impatiens
- Begonias
Because many of the containers are small, compact varieties usually perform better than large plants.
Watering Tips
Vertical gardens tend to dry out faster than traditional garden beds.
The small metal pots around the wheel may need water more frequently than the central planter.
Check the soil with your finger before watering.
During hot summer weather, some small containers may require daily watering.
Water slowly until moisture begins draining from the bottom.
Avoid allowing water to constantly collect inside metal containers because this can damage roots.
Fertilizing the Flowers
Container plants gradually use nutrients stored in the potting mix.
Apply a balanced liquid fertilizer every few weeks during the active growing season, following the product directions.
Alternatively, mix slow-release fertilizer into the soil at planting time.
Do not overfertilize.
Too much fertilizer can produce excessive leafy growth with fewer flowers.
How to Keep the Display Looking Full
Deadhead faded flowers regularly.
Removing old blooms encourages many annual plants to produce new flowers.
Trim trailing plants if they begin covering important parts of the wheel.
Rotate or replace struggling plants when necessary.
Because the containers are separate, individual flowers can easily be swapped without rebuilding the entire garden.
This makes seasonal updates simple.
Seasonal Ideas
The wheel can be redesigned throughout the year.
For spring, use pansies, violas, and alyssum.
During summer, switch to petunias, geraniums, verbena, and marigolds.
In fall, use mums, ornamental grasses, pumpkins, and trailing foliage.
During winter, remove delicate annuals and decorate the wheel with evergreen branches, pinecones, berries, or simple outdoor lights.
Tips for a More Authentic Rustic Look
Do not make every planter identical.
Mix rusty tin cans, galvanized containers, terracotta, and weathered wood.
Allow some natural patina to remain visible.
Repeat flower colors in several parts of the display so the arrangement feels intentional even though the containers are mismatched.
Also leave parts of the wheel exposed.
The goal is to decorate the wagon wheel, not completely hide it.
Its old spokes, rusted rim, and farm-style construction are essential parts of the design.
Turn an Old Farm Wheel Into a Garden Centerpiece
This DIY wagon wheel flower garden is a creative way to combine vertical gardening with rustic farmhouse décor.
The large wheel provides a dramatic structure, while small hanging pots, climbing vines, colorful blooms, and a central wooden planter transform it into a living floral installation.
It works especially well in large backyards, country gardens, barn settings, and cottage-style landscapes where traditional farm materials already feel at home.
With proper support, good drainage, and regular maintenance, an old wagon wheel can become much more than a forgotten piece of equipment. It can serve as a colorful garden centerpiece that changes with the seasons and becomes more beautiful as the plants grow around its weathered frame.