What Is a Recycled Plastic Bottle Rose Bouquet?
A recycled plastic bottle rose bouquet is a decorative floral arrangement made by cutting plastic bottles into individual petal shapes and assembling them into layered flowers.
The example shown uses white petals with a soft ivory center, green stems, and realistic-looking leaves. Several finished flowers are grouped together in a cream-colored planter filled with decorative brown pebbles.
Unlike fresh flowers, this arrangement does not wilt, need water, or require regular maintenance. It can be customized in almost any color and used as year-round décor.
The key to making the flowers look convincing is layering. A single circle of petals may look flat, but multiple layers of different sizes create the depth and curled structure of a real rose.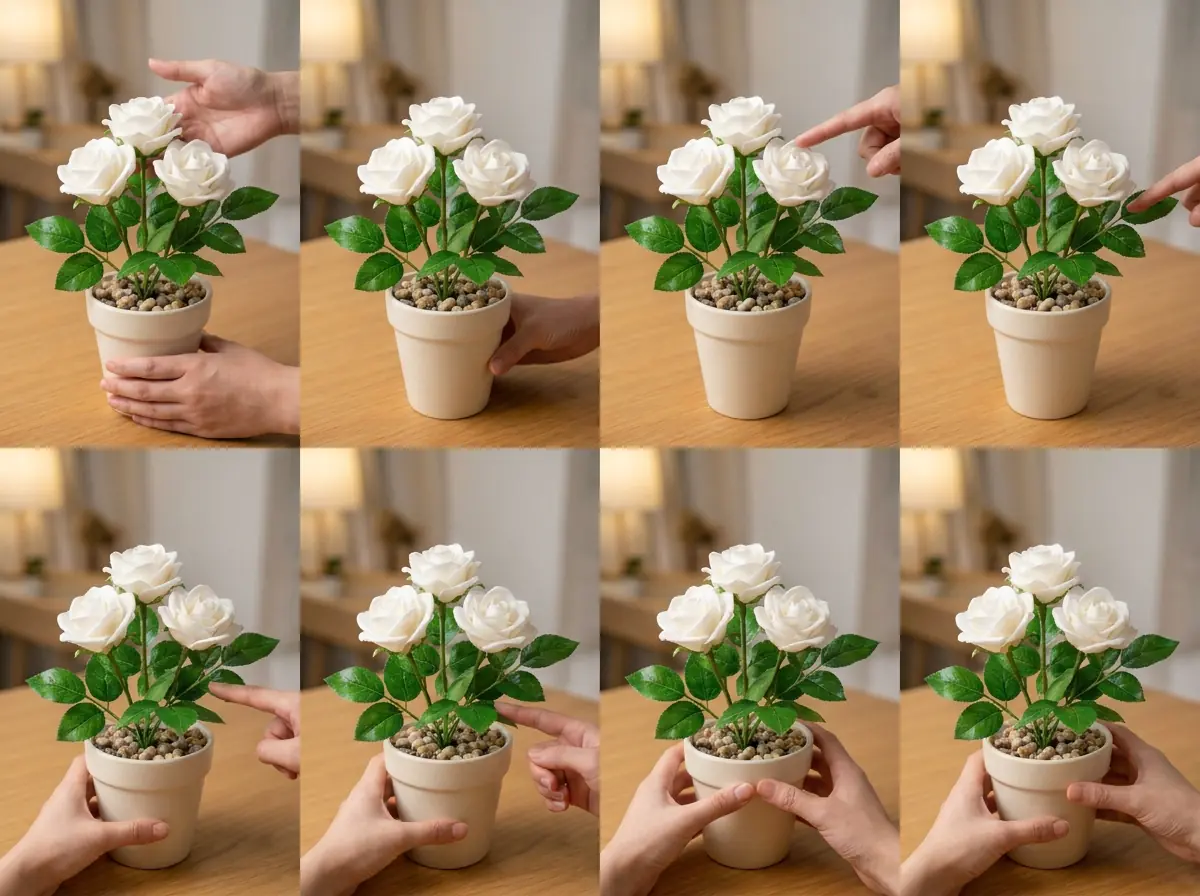
Materials and Tools Needed
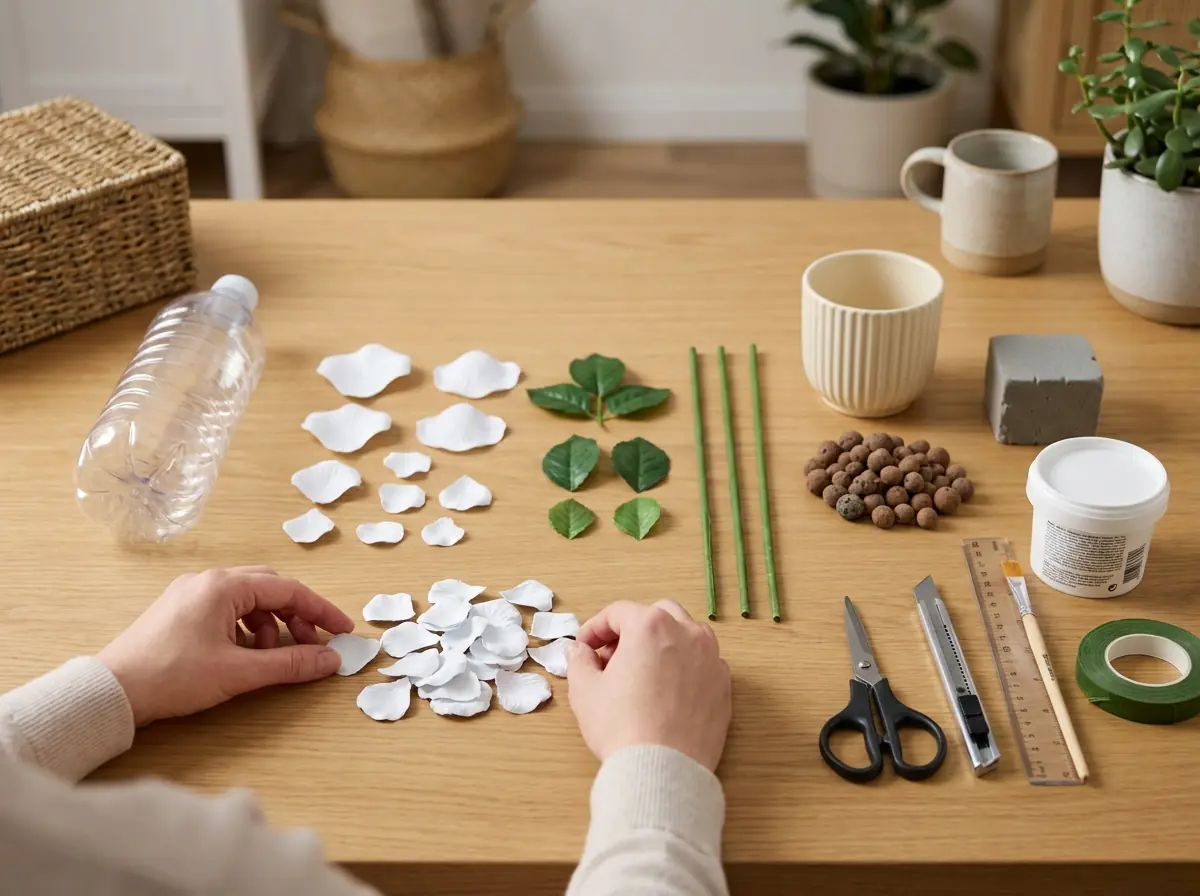
To make a bouquet similar to the one shown, gather:
- Several clean plastic bottles
- White spray paint or white acrylic paint, if using clear plastic
- Green floral stems, wooden skewers, or thin dowels
- Artificial green leaves or handmade plastic leaves
- Strong craft glue
- Hot glue gun with low-temperature glue, optional
- Sharp scissors
- Craft knife
- Cutting mat
- Pencil or washable marker
- Cardstock for petal templates
- Small paintbrush
- Green floral tape
- Green acrylic paint, optional
- Small flower pot or ceramic planter
- Floral foam
- Decorative pebbles, beads, or lightweight stones
- Pliers
- Fine sandpaper, optional
- Protective gloves
If you want a softer, more natural-looking center, you can use ivory or pale yellow paint on the smallest petals.
Step 1: Clean and Prepare the Bottles
Wash the plastic bottles thoroughly with warm water and dish soap.
Remove all labels and adhesive residue.
Allow the bottles to dry completely before cutting.
For most flowers, the smooth middle section of the bottle is the easiest part to work with. Cut off the top and bottom sections, then open the cylindrical center so you have a flatter piece of plastic.
The bottle bottom can also be useful for creating rounded flower centers or decorative elements.
Wear gloves while cutting because plastic edges can be sharp.
Step 2: Create Petal Templates
Draw several petal sizes on cardstock.
You will need approximately:
- Small petals for the flower center
- Medium petals for the middle layers
- Large petals for the outer layers
The basic shape can resemble a rounded teardrop, with a wider top and narrower bottom.
For a fuller rose, make at least three different sizes.
Cut out the cardstock templates and use them to trace multiple petals onto the plastic.
A single flower may require 15 to 25 petals depending on how large and dense you want it to look.
Step 3: Cut the Plastic Petals
Carefully cut each petal using sharp scissors.
Try to keep petals within the same size group relatively consistent, but they do not need to be perfectly identical.
Slight variation actually makes the flower look more natural.
Trim away any sharp corners.
If necessary, use very fine sandpaper to smooth rough edges.
Repeat the process until you have enough petals for all the flowers you plan to make.
Step 4: Shape the Petals
Flat plastic will not resemble a natural flower until it is curved.
Gently bend each petal by hand.
The smallest petals should curl inward because they will form the tight center of the rose.
Medium petals can curve slightly outward.
The largest petals should open more broadly.
If the plastic is thin enough, hand shaping may be all you need.
Avoid using open flames or excessive heat to shape the petals. Plastic can melt quickly and may release fumes when overheated.
Step 5: Paint the Petals
If you are using clear plastic, paint both sides of the petals white.
Several thin coats usually produce a smoother finish than one heavy coat.
Allow each layer to dry before applying another.
For a more realistic rose, keep the smallest center petals slightly ivory or cream while leaving the outer petals bright white.
This subtle color difference creates depth when the flower is assembled.
Let all painted pieces dry completely before gluing them together.
Step 6: Build the Rose Center
Begin with several of the smallest petals.
Take one petal and curl it tightly to form the center bud.
Attach a second petal around it, overlapping the first.
Continue adding small petals one at a time in a spiral pattern.
Each new petal should slightly overlap the previous one.
The center should remain tight and compact.
Once the center feels secure, begin adding medium petals.
Step 7: Add the Middle Petals
Attach the medium petals around the flower center.
Stagger them rather than lining them up directly behind one another.
Angle these petals slightly outward.
Continue adding petals evenly around the rose.
Rotate the flower as you work so one side does not become heavier than the other.
At this stage, the flower should begin to look noticeably fuller.
Step 8: Add the Large Outer Petals
Use the largest petals for the final layer.
These should open outward more than the center petals.
Attach them around the base of the flower, maintaining a balanced circular shape.
You can gently adjust individual petals after the adhesive sets.
The outer petals should create the broad, open appearance of a mature rose.
Repeat this entire process to create several flowers for your bouquet.
Three flowers make a simple arrangement, while five or more create a fuller centerpiece.
Step 9: Make the Stems
Use floral stems, thin wooden dowels, or sturdy wire as the main support.
If using wooden skewers, paint them green or wrap them completely with green floral tape.
Attach the flower securely to the top of the stem.
Make sure the connection is strong enough to support the weight of the layered plastic petals.
For larger flowers, you may need to reinforce the connection with both glue and floral tape.
Step 10: Add Green Leaves
Attach several leaves to each stem.
You can use premade artificial leaves or make your own from green plastic.
For handmade leaves, cut pointed oval shapes from plastic and paint them green.
Add a central vein and smaller side veins for realism.
Arrange leaves at different heights along the stems.
Avoid making every stem identical.
Natural variation makes the final bouquet more convincing.
Step 11: Prepare the Planter
Choose a small ceramic or decorative planter.
Place a block of floral foam inside.
Push each stem into the foam until it stands securely.
Arrange the tallest flower near the back or center.
Place medium-height flowers around it and slightly lower flowers toward the front.
This creates a more natural layered arrangement.
Once you are satisfied with the composition, cover the floral foam with decorative pebbles, beads, bark, or lightweight stones.
The filler hides the support material and gives the planter a finished appearance.
Step 12: Adjust the Final Arrangement
Stand back and inspect the bouquet from several angles.
Rotate individual flowers if necessary.
Adjust the leaves so they fill empty spaces without hiding the roses.
The arrangement should feel balanced but not perfectly symmetrical.
If all flowers face exactly forward, the bouquet may appear flat.
Slightly angle some flowers outward or sideways to create a more natural look.
Tips for More Realistic Plastic Roses
The most important detail is petal layering.
Use smaller petals tightly packed near the center and gradually increase the petal size toward the outside.
Do not make every petal curve the same way.
Some should curl inward, while others should open farther outward.
Also consider adding a very subtle cream tint near the center of each rose. This can prevent the flower from looking completely flat and monochromatic.
For the leaves, varying the size and angle helps create a more believable arrangement.
How to Care for Your Finished Plastic Flower Bouquet
One advantage of recycled plastic flowers is that they require very little maintenance.
Dust the petals and leaves occasionally using a soft cloth or small clean paintbrush.
If the arrangement becomes dirty, gently wipe the plastic with a slightly damp cloth.
Avoid harsh chemical cleaners because they may damage the paint.
Keep the bouquet away from strong heat sources, fireplaces, candles, and direct contact with hot light bulbs.
Long-term exposure to intense sunlight may also fade the painted surfaces.
Creative Ways to Customize the Project
You do not have to make white roses.
Try:
- Blush pink roses
- Deep red roses
- Pale yellow flowers
- Lavender roses
- Peach-colored flowers
- Two-tone petals
- Metallic gold or silver decorative flowers
You can also mix flower sizes in the same arrangement.
For wedding décor, make several white roses and place them in matching ceramic pots.
For seasonal decorations, change the flower colors and container style.
The same basic technique can also be adapted to make daisies, peonies, camellias, or other layered flowers.
Turn Empty Bottles Into Long-Lasting Floral Decor
This DIY recycled plastic bottle rose bouquet proves that discarded materials can become surprisingly attractive home décor.
With a few bottles, some paint, simple stems, leaves, and a small planter, you can create flowers that stay beautiful without watering or replacing them.
The project takes patience because each rose is built petal by petal, but that layered construction is exactly what gives the finished flowers their depth and handmade character.
Displayed on a table, shelf, entryway console, or desk, these recycled white roses offer a creative alternative to store-bought artificial flowers—and give ordinary plastic bottles a completely new purpose.