This Sensation Cake is the kind of dessert made for serious chocolate lovers: soft, deeply chocolatey cake layered with a smooth cream filling and finished with glossy chocolate ganache. Every slice has a combination of moist cake, cool creamy filling, and rich chocolate that makes it feel like a bakery-style celebration cake.
The chocolate cake uses both cocoa and hot coffee to deepen the flavor without making the cake taste like coffee. A light mascarpone-cream filling keeps the layers from becoming too heavy, while the ganache gives the finished cake its dramatic, indulgent appearance.
It's perfect for birthdays, holidays, dinner parties, anniversaries, or whenever you want a show-stopping chocolate layer cake.
Ingredients
For the Chocolate Cake
- 2 cups (250g) all-purpose flour
- ¾ cup (65g) unsweetened cocoa powder
- 1¾ cups (350g) granulated sugar
- 2 teaspoons baking soda
- 1 teaspoon baking powder
- 1 teaspoon salt
- 2 large eggs, room temperature
- 1 cup (240ml) buttermilk, room temperature
- ½ cup (120ml) vegetable oil
- 2 teaspoons pure vanilla extract
- 1 cup (240ml) hot brewed coffee
For the Cream Filling
- 8 ounces (226g) mascarpone cheese, cold
- 1½ cups (360ml) cold heavy whipping cream
- ½ cup (60g) powdered sugar
- 2 teaspoons pure vanilla extract
- Pinch of salt
For the Chocolate Ganache
- 8 ounces (226g) semisweet chocolate, finely chopped
- ¾ cup (180ml) heavy cream
- 1 tablespoon unsalted butter
For Decorating
- Chocolate curls or shavings
- Chocolate pieces
- Fresh strawberries or raspberries, optional
- Powdered sugar, optional
How to Make Sensation Cake
Step 1 – Prepare the Pans
Preheat the oven to 350°F (175°C).
Grease two 9-inch round cake pans and line the bottoms with parchment paper.
Lightly grease the parchment as well.
Step 2 – Combine the Dry Ingredients
In a large bowl, whisk together:
- Flour
- Cocoa powder
- Sugar
- Baking soda
- Baking powder
- Salt
Break up any cocoa lumps before adding the wet ingredients.
Step 3 – Add the Wet Ingredients
Add the eggs, buttermilk, vegetable oil, and vanilla.
Mix on low speed until combined, then mix briefly on medium until the batter is smooth.
Step 4 – Add the Hot Coffee
Slowly pour in the hot coffee while mixing on low.
The finished batter will look quite thin. That's exactly what you want.
Hot coffee blooms the cocoa and intensifies the chocolate flavor.
Step 5 – Bake
Divide the batter evenly between the prepared pans.
Bake for approximately 28–34 minutes, or until a toothpick inserted near the center comes out with a few moist crumbs.
Don't overbake.
Cool in the pans for about 10–15 minutes, then carefully turn the cakes onto wire racks.
Cool completely before assembling.
Make the Cream Filling
Place the cold mascarpone in a mixing bowl and beat very briefly until smooth.
Add the cold heavy cream, powdered sugar, vanilla, and salt.
Beat on medium speed until the mixture becomes thick and holds medium-stiff peaks.
Don't overbeat or the mascarpone mixture can become grainy.
Keep refrigerated until you're ready to assemble the cake.
Make the Chocolate Ganache
Place the chopped chocolate in a heatproof bowl.
Heat the heavy cream until steaming and just beginning to simmer around the edges.
Pour it over the chocolate.
Let stand untouched for 2–3 minutes.
Stir slowly from the center outward until completely smooth.
Add the butter and stir until glossy.
Allow the ganache to cool until thickened but still pourable.
Assemble the Sensation Cake
Step 6 – Level the Cakes
If necessary, trim the domed tops of the completely cooled cakes with a serrated knife.
Place the first cake layer on a serving plate or cake stand.
Step 7 – Add the Cream
Spread a generous layer of mascarpone cream over the first chocolate cake.
Keep the filling slightly away from the outer edge so it doesn't squeeze out when the second layer is added.
Step 8 – Add the Second Layer
Carefully position the second chocolate cake layer on top.
Press very gently to secure it.
Refrigerate for approximately 20–30 minutes to firm the filling before adding the ganache.
Cover With Chocolate Ganache
Pour the thickened ganache over the center of the chilled cake.
Use an offset spatula to gently spread it toward the edges, allowing some chocolate to naturally drip down the sides.
For a completely covered cake, make 1½ batches of ganache and spread it around the sides as well.
Decorate with chocolate curls, chocolate pieces, or fresh berries.
Chill Before Slicing
Refrigerate the assembled cake for approximately 1 hour before slicing.
This gives the cream and ganache time to firm up and produces cleaner layers.
For the best flavor and texture, let individual slices sit at room temperature for about 10–15 minutes before eating.
Chef's Tips for the Best Sensation Cake
- Use natural unsweetened cocoa powder for a classic chocolate flavor.
- Don't skip the coffee—it dramatically improves the depth of the cocoa.
- Coffee can be replaced with hot water if necessary.
- Measure flour carefully to avoid a dry cake.
- Don't overmix once the flour is hydrated.
- Don't overbake the chocolate layers.
- Cool the cakes completely before adding cream.
- Keep mascarpone and heavy cream cold.
- Stop whipping once the filling holds its shape.
- Let the ganache cool before pouring it onto the cake.
- Chill the assembled cake before cutting.
The Secret to an Extra-Moist Chocolate Cake
This cake uses oil instead of butter in the batter.
Butter gives cakes wonderful flavor, but oil stays fluid at cooler temperatures, helping this chocolate cake remain tender even after refrigeration.
Buttermilk adds both moisture and acidity, while hot coffee brings out the cocoa's deeper roasted notes.
The combination creates a chocolate cake that remains soft enough to pair with a chilled cream filling.
The Secret to the Creamy Middle
Mascarpone makes the filling richer and more stable than ordinary whipped cream without making it as heavy as traditional buttercream.
The important part is temperature.
Use cold mascarpone and cold heavy cream, and don't overbeat them. Once the filling holds medium-stiff peaks, stop the mixer.
That produces a silky cream that stays between the cake layers rather than running out when sliced.
Delicious Variations
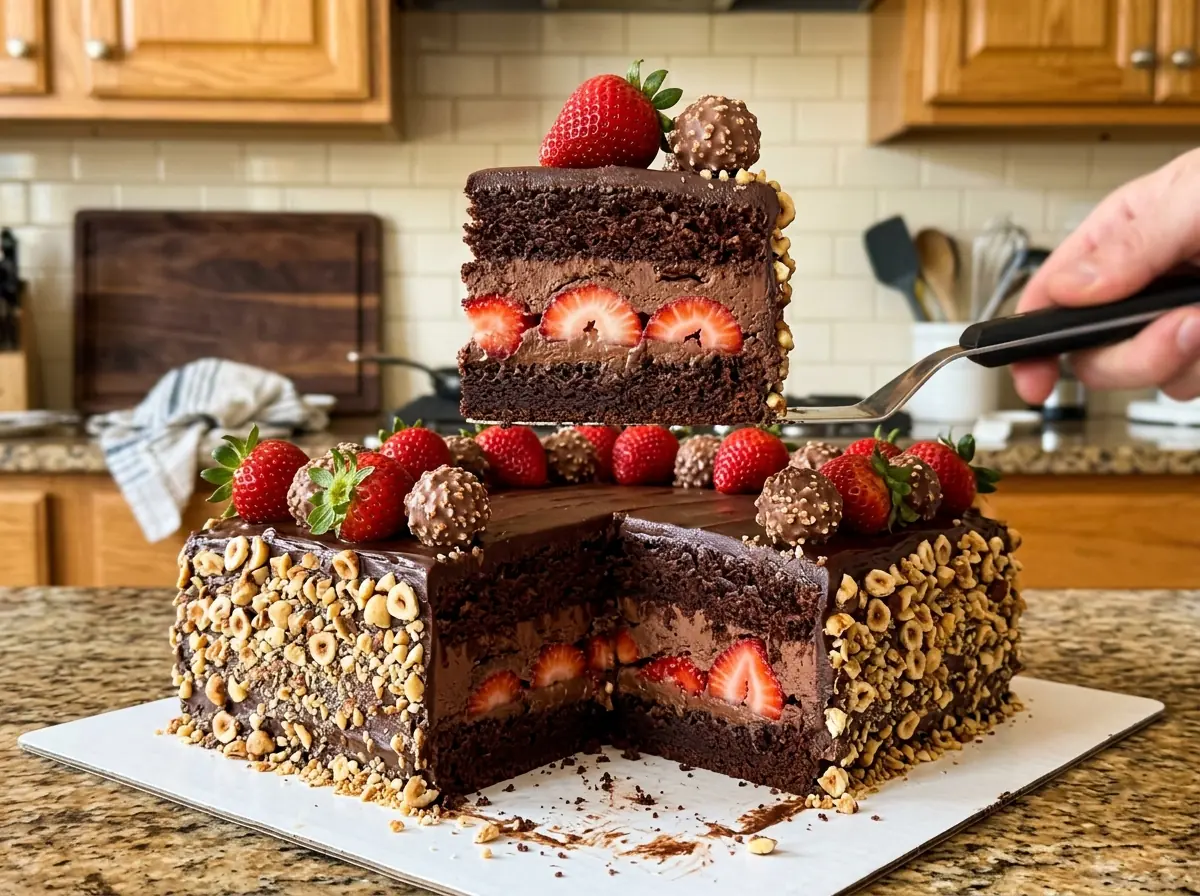
Chocolate Strawberry Sensation Cake
Add thinly sliced fresh strawberries over the mascarpone filling before adding the second cake layer.
Chocolate Raspberry
Spread a thin layer of raspberry preserves over the bottom cake before adding the cream.
Oreo Sensation Cake
Fold crushed Oreos into the mascarpone filling and decorate the top with Oreo pieces.
Nutella Sensation Cake
Add ⅓ cup Nutella to the mascarpone filling and decorate with toasted hazelnuts.
Salted Caramel Sensation Cake
Drizzle thick caramel over the cream filling and finish the ganache with flaky sea salt.
Black Forest Sensation Cake
Add cherry filling between the layers and decorate with whipped cream, cherries, and chocolate curls.
Mocha Sensation Cake
Add 1 teaspoon espresso powder to the ganache for an even deeper coffee-chocolate flavor.
What to Serve With Sensation Cake
Because the cake is already rich, simple accompaniments work best:
- Fresh strawberries
- Raspberries
- Hot coffee
- Espresso
- Cold milk
- Vanilla ice cream
- Lightly sweetened whipped cream
Fresh berries are especially good because their acidity balances the chocolate and cream.
Make-Ahead Tips
The chocolate cake layers can be baked 1–2 days ahead.
Once completely cool, wrap each layer tightly and keep at room temperature for one day or refrigerate for up to two days.
The entire cake can also be assembled the day before serving. In fact, a few hours of refrigeration helps the layers settle and makes slicing easier.
Add delicate fresh-fruit decorations shortly before serving.
Storage
Refrigerator
Because the cake contains mascarpone and whipped cream, keep it refrigerated.
Store covered for up to 3–4 days.
Freezer
The plain chocolate cake layers freeze beautifully for up to 2 months.
Wrap them tightly in plastic wrap followed by foil.
For the best texture and appearance, freeze the cake layers before adding the mascarpone filling and ganache.
Notes
- Makes one 9-inch two-layer cake, approximately 10–12 servings.
- The chocolate batter is intentionally thin after adding hot coffee.
- Don't put mascarpone filling onto warm cake layers.
- For three thinner layers, divide the batter among three 8-inch pans and begin checking for doneness earlier.
- Semisweet chocolate gives the ganache a balanced flavor; darker chocolate creates a more intense, less-sweet finish.
- For a dramatic bakery presentation, finish the cake with glossy ganache drips, chocolate curls, and a few fresh berries while leaving the thick cream layer clearly visible when sliced.